Welcome & Thank You!
First off, thank you for grabbing this guide! I’m excited to walk you through the best practices for capturing your golf swing. Here’s what we’ll cover…
- How to position your phone correctly to capture accurate swing footage
- The most common camera setup mistakes and how to avoid them
- How to quickly and easily set up your tripod
- DTL and CV Swing Checkpoints
- Why the Posterior View camera angle matters and how to use it
- A detailed swing analysis breakdown using the posterior view angle (Every Checkpoint)
- Why ball flight and strike information is essential when reviewing your swing
- Pivot Checkpoints from Face on and Down the Line
- 3 extra tips to improve the quality of every swing video you record
Online coaching is proving to be an extremely effective method for advancing your game to the next level. The flexibility to train when and where is convenient to you, along with the increased feedback loop are some of the reasons why it is becoming the go-to option for players to improve.
One of the first steps new members of the Online Academy go over is an easy system to record their swing from the right positions consistently and cover some of the key questions to think about when uploading their swing videos for their first analysis.
In this article I am going to highlight some of those steps so you can make sure you are getting the best experience and best results possible from your online coaching.
Positioning the Camera
The main two angles you will need is a Face on Angle and a Down the Line Angle.
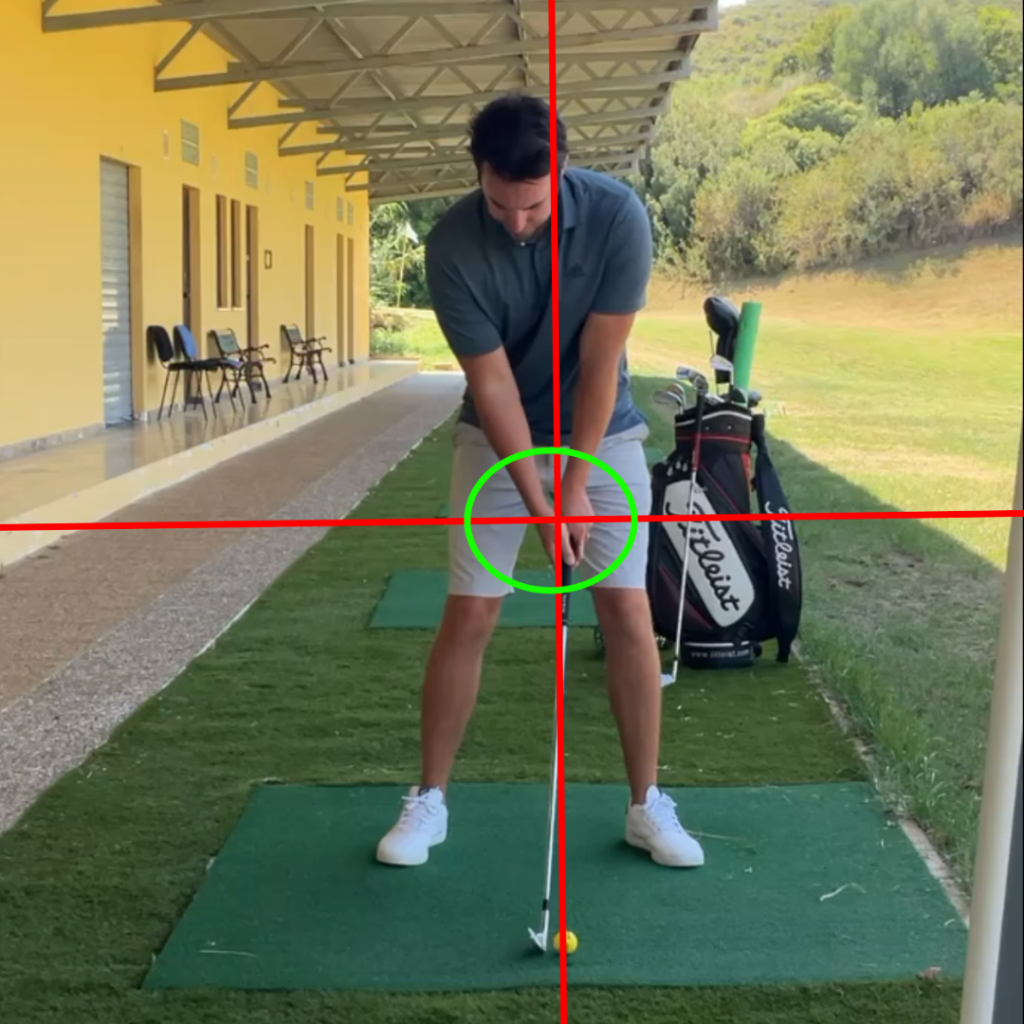
Face On
- Camera 10ft away from player
- Hands in the middle of the camera
- Camera Hand height
From this angle we’re generally looking for swing characteristics that will influence your ability to create power, a consistent strike and trajectory control.
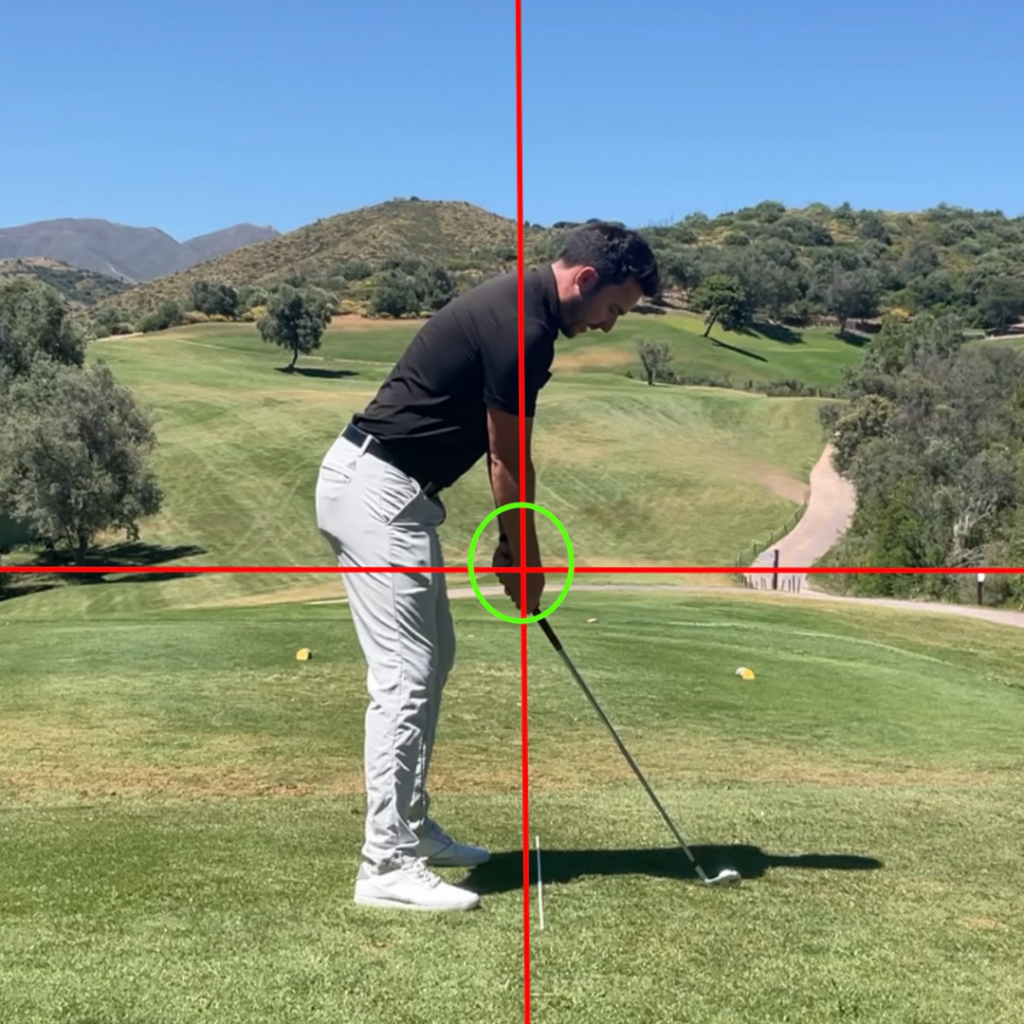
Down the Line
- Camera 10ft away from player
- Hands in the middle of the camera
- Camera Hand Height
When looking from this angle we can highlight characteristics that influence your start direction and curvature.
Think hands in the middle of the screen for both
Watch this Short Video on Setting up your Phone to Record your Swing
Common Pit Falls
Two of the main pitfalls is either videoing the swing from too close a range or positioning the camera too far right of the player (for a right handed player). Why are the angles so important you might be thinking?
Camera to close
When a camera is to close you’re unable to track the full movement of the club and club face. You want to record the video from about 10ft away. This ensures you capture the full movement of the body, club and club head from start to finish.
Camera position too far right of the player
Both positions in the images below are the same, however due to the camera angle they both appear different.
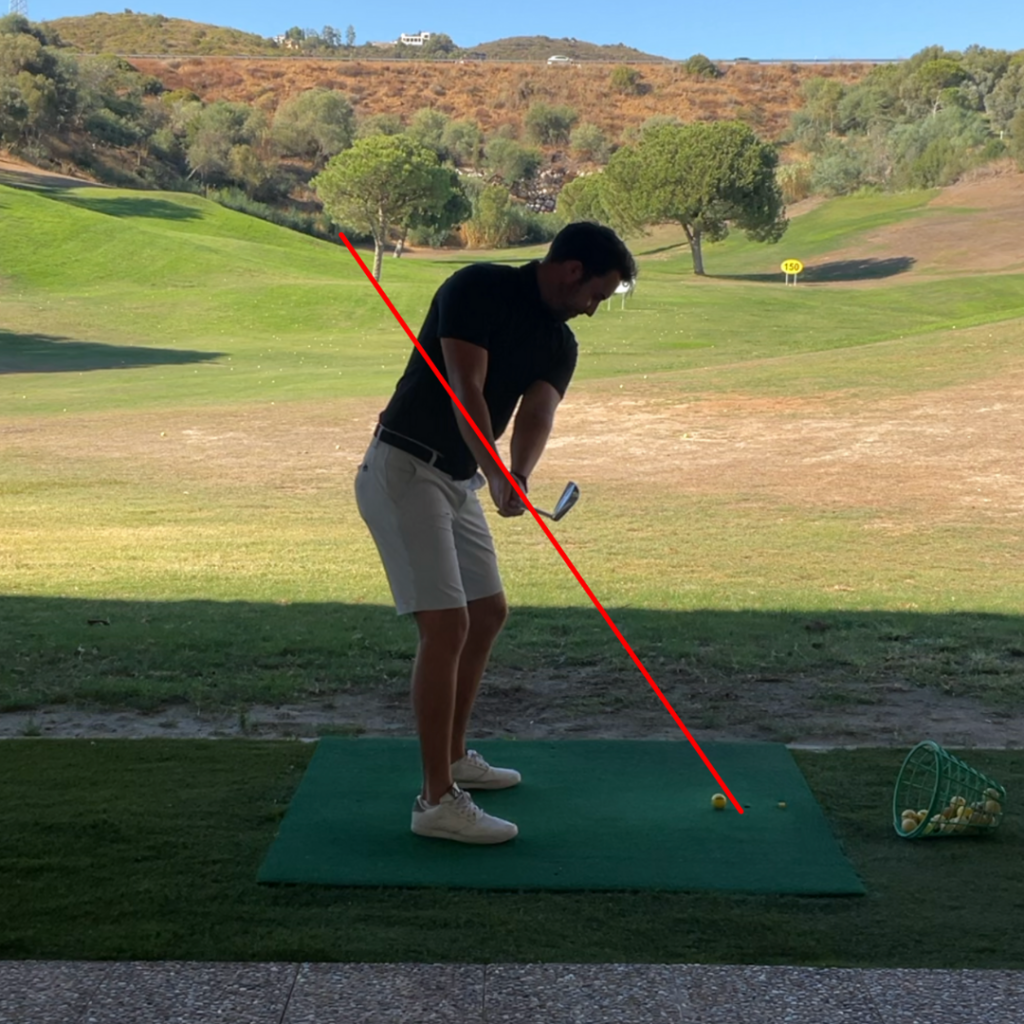
Good Camera Angle
Notice the club head is just above the swing plane line I’ve drawn.
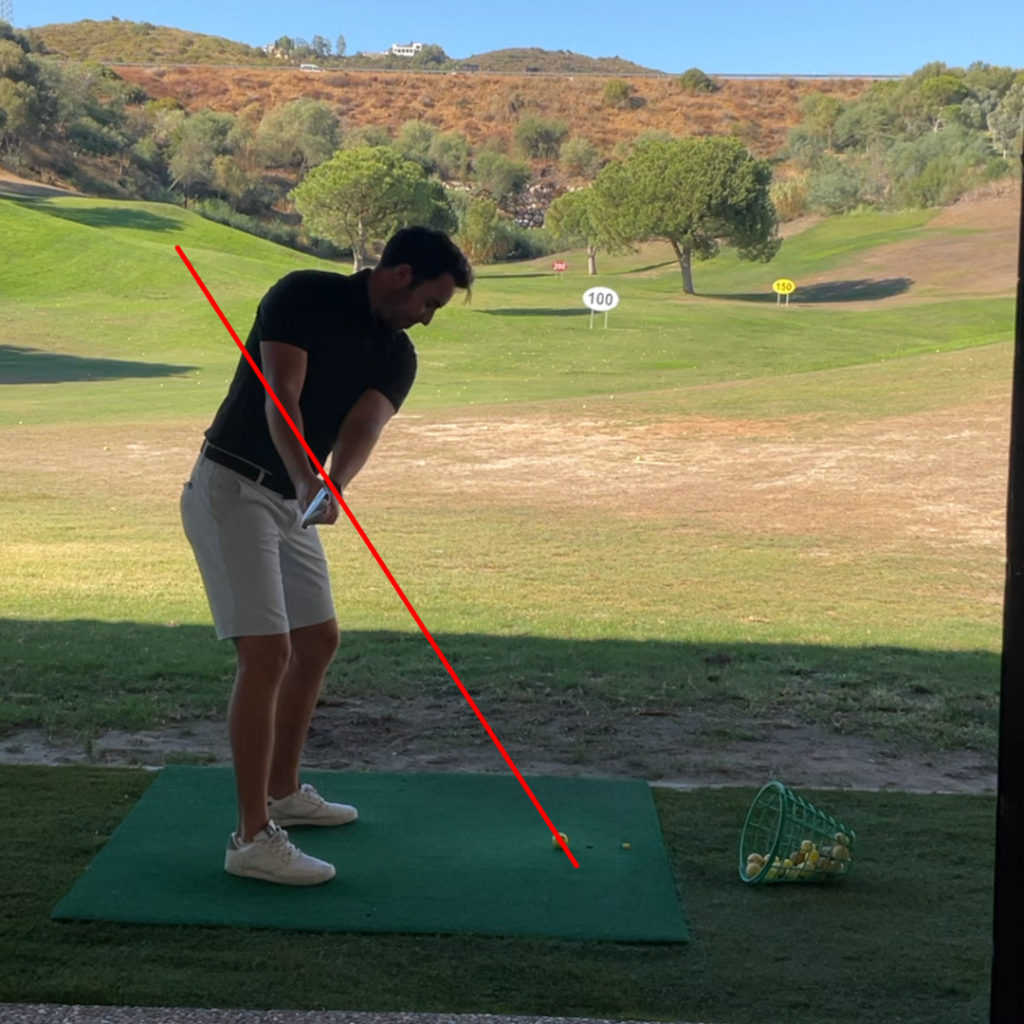
Incorrect Camera Angle
I am in the same takeaway position here. However it appears that my takeaway is under the plane line due to the poor position of the camera.
By viewing these two take away positions its easy to highlight the importance of getting the camera positioning right. I’ve often had players video their own swing and ask me about fixing certain positions, when they show me the swing video its often the case that they’re not in the positions they think they are at all! Getting the camera position right ensures the video gives you accurate information, so your practice time is spent working on the areas that truly matter.
Face On and Down The Line Swing Checkpoints
Bonus Angle- Posterior View
This angle is not necessary however if you manage to record it the swing evaluation can be enhanced.
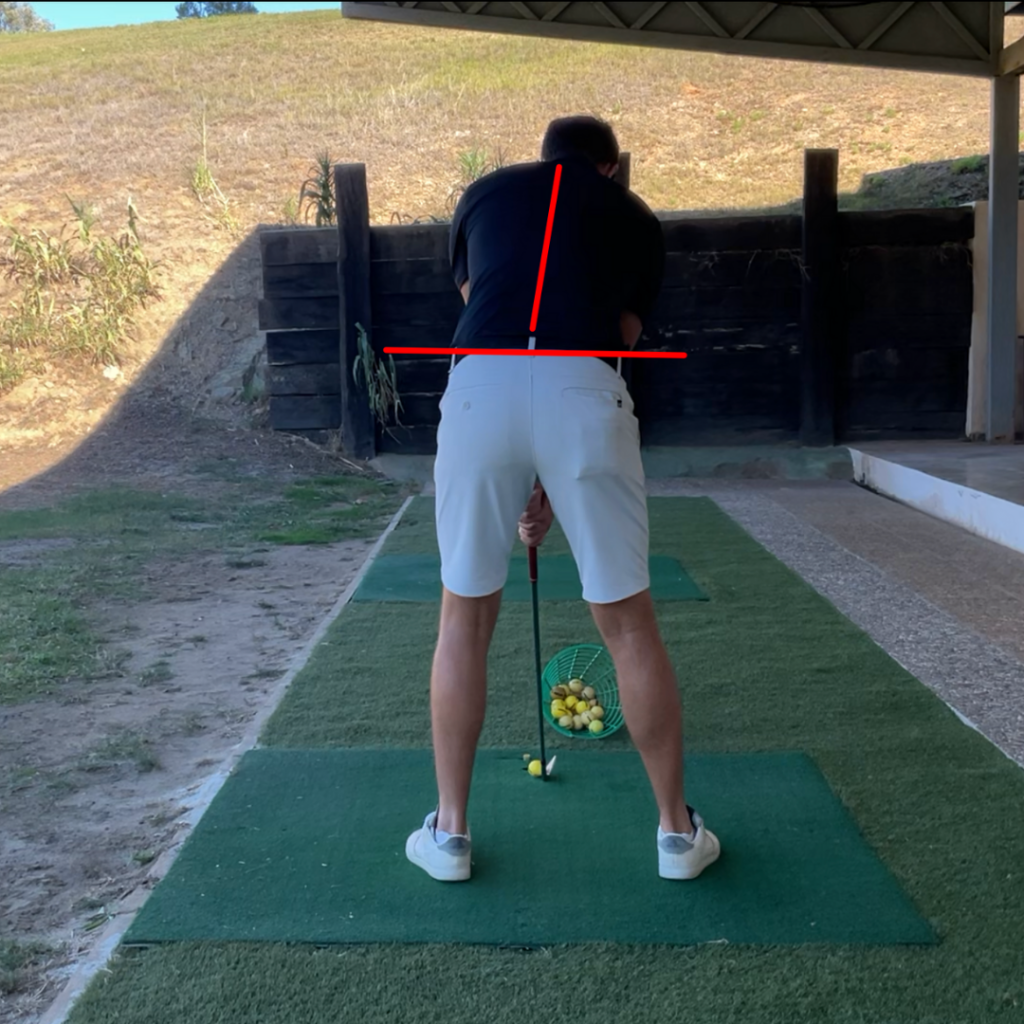
Set up
This angle gives a great look at how the spine and pelvis are aligned. Poor symmetry at set up can often times be the root cause to many ball flights and poor swing patterns.
Transition
We can get a great look at the motion of the pelvis and spine in transition from here too. Getting the body pivot moving efficiently is key for consistency and power.
Take a Look at the Video below for a Deep Dive on what we can Learn from the Posterior View Camera Angle
Ball flight and Strike Tendencies
The key before embarking on any swing work is to identify your ball flight and strike tendencies. For example, what is your ball flight when you’re playing well and what is the ball flight that gets you into trouble, your miss. What is your tendencies when it comes to strike quality? Is it normally good or for example do you tend to hit it too clean or too heavy?
By identifying and having academy members asses this information it means players can avoid working on parts of their technique that they may not need to.
When we evaluate the golf swing its best to prioritise function over aesthetics if our goal is to shoot the lowest score. Without any context of ball flight it may cause you to make a change that’s not needed. The ball flight is a key factor that determines the difference between a ‘Swing Fault’ and a ‘Swing Characteristic’.
By providing details on your start direction, curvature, trajectory and strike your coach will be able to determine the impact factors that need work and the swing principles that will get you there the quickest way possible.
3 Extra Tips
Tripod
Using a tripod will be one of the best things you can do to get the most out of your coaching online. It makes it easy to set up your practice station consistently without having to rely on someone to get the right angle. By having the camera in a fixed position your feedback analysis will be as accurate as possible.
Consistency
There are slight variables to camera angles and some coaches may have their own preferences. What’s important though is to be consistent with them on every video.
More Information the Better
You will be asked this starting out, but if not make sure you share information about any injuries you may have or if pain occurs when playing or practising. By sharing any limiting factors you have, your coach may be able to tie in a relationship between your swing and body. This again can get to the root cause and see you improve the most efficient and pain free way possible.
There is no doubt that learning online can provide powerful results and by following the steps in this article you will maximize its potential! It is a great way to understand your own some swing patterns and create clarity in every practice session.
FREE 7 Day Trial
I hope this guide has been helpful, if you’d like to take your learning even further, I’d love to offer you a Free 7 Day Trial inside the Online Academy. In the trial we will…
- Work together and Analyze your swing in detail and identifying key areas for improvement.
- Create a personalized practice plan tailored to your unique needs, helping you focus on what truly matters for your game.
- Provide direct feedback on your progress, ensuring you stay on the right track and make the most out of every practice session.
- You will also get instant access to check out all the resources inside the Academy.
If you’re interested in the 7 Day Trial, just send me a direct message or an email to philliptanham@gmail.com and I’ll be in touch to guide you every step of the way.
If you already have golf swings recorded in your phone you could have your first lesson within hours!
Thank You for Taking the Time to Work Through the Guide!
I want to take a moment to thank you for working through the guide. Golf is tough, and it’s not always easy to make progress. But every bit of effort you put in brings you one step closer.
Improvement doesn’t happen overnight, but every swing and every practice session is another opportunity to refine your skills.
Keep pushing forward,
Hope to hear from you,
Phil
For more instructional videos and examples of what an Online Swing Analysis is like head to the Free Article Section to find 70 plus free resources.